
WWW.NBI Clearance.GOV.PH — Got it, let’s dial it down a notch and make it even more natural, like a conversation over coffee.
Hey! So, about getting that NBI Clearance in the Philippines—you’re not going to believe how easy it’s become. Now, instead of the whole drag of going down to the NBI office, you can just hop online to their official site, WWW NBI Clearance GOV PH, and sort it all out from wherever you’re most comfy. A total game-changer, right?
But yeah, I hear you on the whole online privacy thing. It’s a bit of a leap for some, putting personal info out there. And sure, tech snags can happen—like the site going down just when you’ve finally decided to do it. It’s annoying but does not happen often.
So if you have been going circles trying to figure out a no-nonsense guide on getting this NBI Clearance, I’m here to help. I’ll walk you through the whole thing, super simple, no jargon. Whether it’s your first NBI Clearance Online application or you’ve been a regular applicant, I’ve got your back. How about we get started?
Table of Contents:
Step 1: NBI Clearance Online Account Registration Step 2: www.NBI Clearance.GOV.ph Login Step 3: NBIClearance Online Appointment Step 4: NBI Clearance Fee Payment Step 5: NBI Clearance Requirements Step 6: Processing Your NBI Clearance Application at the Branch Step 7: NBI Clearance Releasing A. NBI Clearance Releasing with HIT B. NBI Clearance Releasing without HITNBI Clearance Online Account Registration
1.First off, you’ll want to jump onto the official website of NBI Clearance Online. This is key step because it keeps you clear of any fake sites out there that might want to steal your personal information. Just a heads-up to keep things safe and sound.
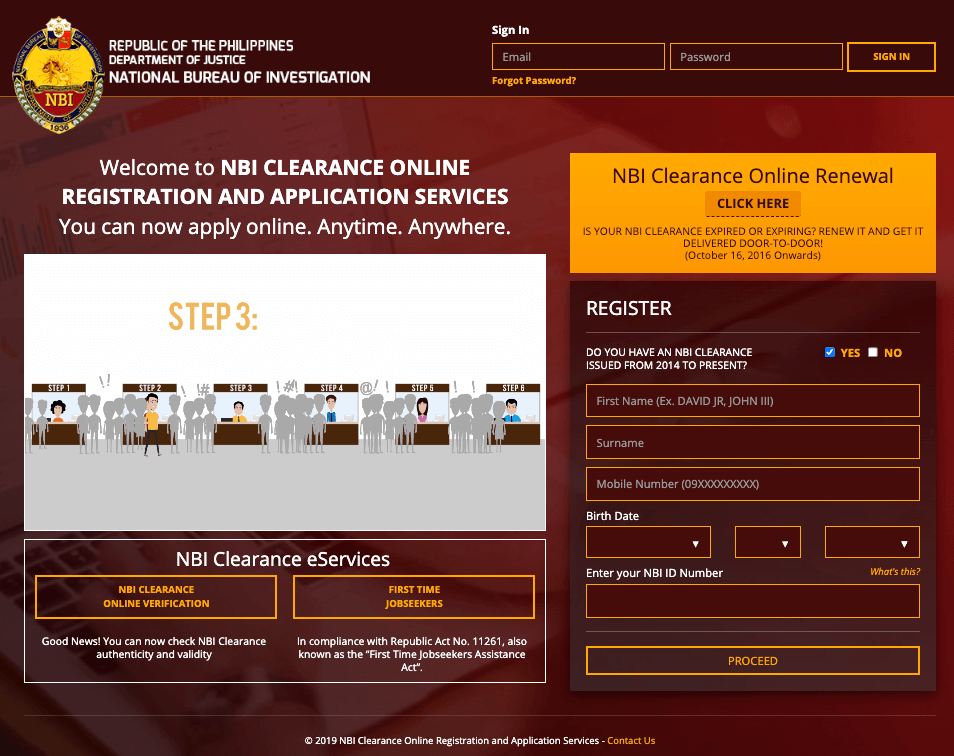
2. Once you land on their homepage, look for the registration area—it’s usually on the right side of the screen. This is where you start things off by setting up your online Clearance.NBI.GOV.PH Registration account. Think of it as your first step on the journey to getting that NBI clearance without a hitch.
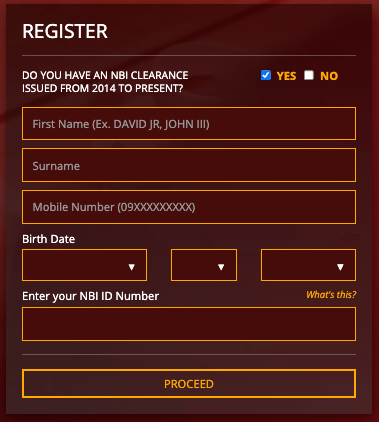
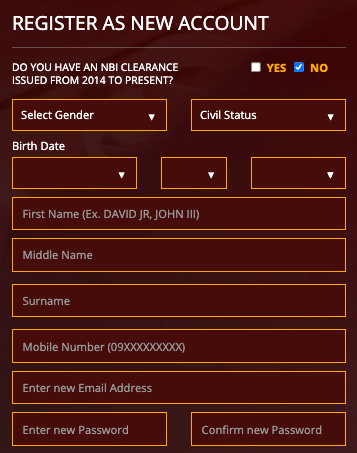
3. Okay, before you start typing away, you’ll see a question asking if you’ve gotten an NBI Clearance after 2014 (“DO YOU HAVE AN NBI CLEARANCE ISSUED FROM 2014 TO PRESENT?“). Since we’re going with the idea that you’re new applicant to this, hit ‘NO’ meaning you have not create an NBI Online Account yet. This bit is pretty straightforward but super important.
Now, if you’ve already got an account set up with NBI Clearance Online, feel free to skip the whole registration dance and head straight to the login section. This part is a time-saver because if your NBI clearance is still in the clear from the last time, renewing it online is a breeze instead of starting from scratch.
4. Once you’re have confirmed that you haven’t got an NBI clearance from previous period or year mention (2014), it’s time to fill out into the forms. This is where you’ll need to enter your personal details. Make sure that you are entering your correct personal information —accuracy’s key here to avoid any hiccups down the road.
5. After you’ve entered all your personal information, you need to tick a small checkbox that’s saying “Read and Accept Terms of Services.

Ticking the check box means you agree with the site’s ToS.
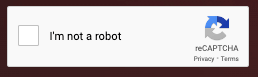
6. So, Before pressing the submit button, you will be tasked to complete the captcha check. It’s a simple mouse click but very important to the steps for you to be able to proceed. This feature make sures that you are a real person and not just bots trying to mimic a person’s activity on the site.
7. After that, press the “Sign Up” button. This will now submit your application form to the NBI Clearance’s database.

8. Next is you’ll get an OTP (One-Time Password) sent to your email address and mobile number. This is how the NBI Clearance website to verify that the contact details you entered are really yours and you really have an access to them.
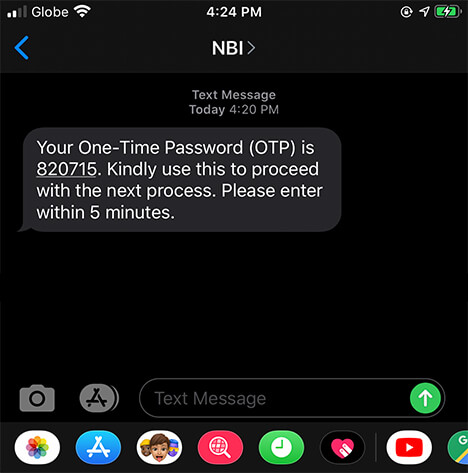
9. From the SMS sent to you mobile number, get the six (6) digit One-Time Password and enter it into the website. This step verifies your your identity and confirms that you really have an access to the mobile number you nominated in your registration. Once submitted, this will automatically sets up your NBI Clearance online account.
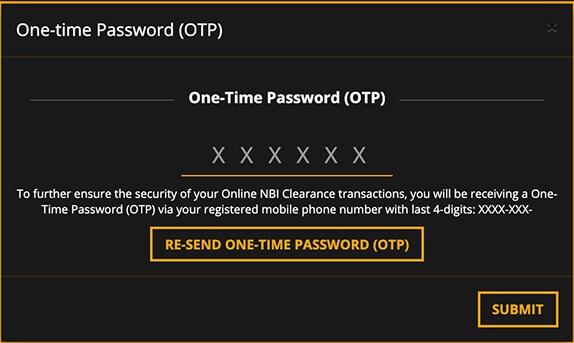
10. Once that OTP is in and confirmed, you’ll get a message from the website saying you’ve successfully created your NBI clearance online account. And just like that, you’re through the first gate! You’ve got your NBI clearance online account ready, setting you up nicely to move on with the rest of the application.
Awesome job! You’ve just nailed the first part of getting your NBI clearance online. With your NBI clearance online account all set up, you’re perfectly positioned to tackle the next steps in the application process smoothly. Just a friendly reminder: while securing your NBI clearance online is a breeze and super convenient, making sure you have complete everything by following each step accurately is crucial. This way, you sidestep any potential problems and issues while applying for an NBI Clearance.
WWW.NBI Clearance.GOV.ph Login
Having your NBI clearance account ready is like having a VIP pass. It lets you apply for your NBI clearance without the hassle of stepping foot outside your door. No more long lines or wasted afternoons at the NBI center. You’re really saving your time and energy!
1. Starting your NBI Clearance application is pretty straightforward. Log into your NBI Clearance account with your registered email address and the password you chose.

Making sure you’ve got the right email and password is crucial here for a smooth start. No mix-ups mean no delays.
2. Once logged in, you’re good to go and ready to start! You’re right at the doorstep of the next step, which is filling out the form getting all your personal information down for your NBI clearance.
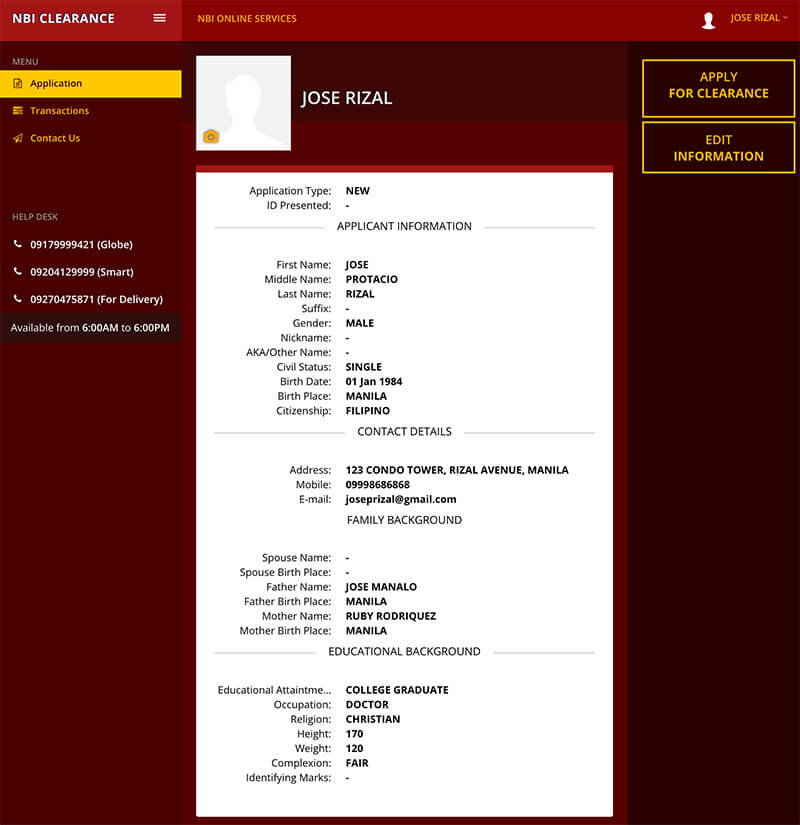
Please ensure you accurately complete all required personal information sections, as this information is crucial for processing your clearance. It’s also vital to provide accurate details since your information will undergo verification. Any inaccuracies might cause delays or issues with your application.
3. If you have previously logged into your NBI clearance online account and completed the application form, you may directly proceed to the subsequent steps. This approach saves time and simplifies the process for returning users.
NBI Clearance Online Appointment
1. Scheduling an appointment is the next important step to ensure a smooth application process. By pressing the “Apply for Clearance” button, you can easily set up an appointment at your convenience.

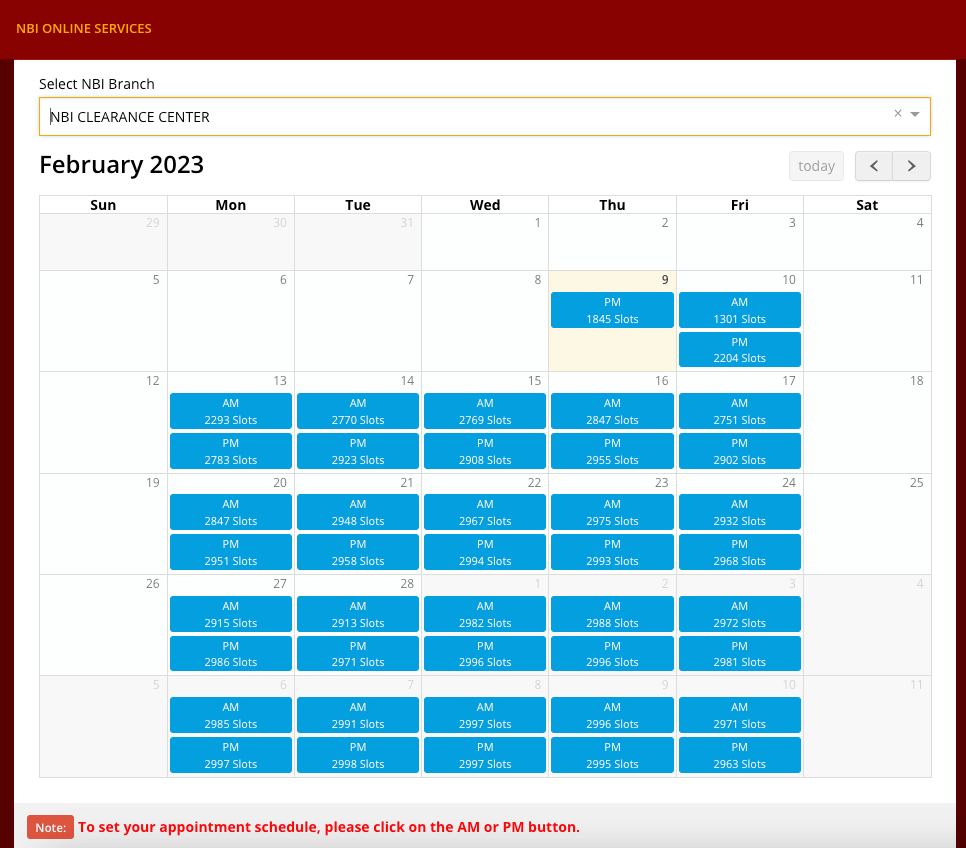
2. Once you press the button, you will be redirected to the NBI Online Services Appointment Schedule page where you can finalize the details of your appointment.
This step is crucial in ensuring that you are on time and ready for your NBI Clearance application.
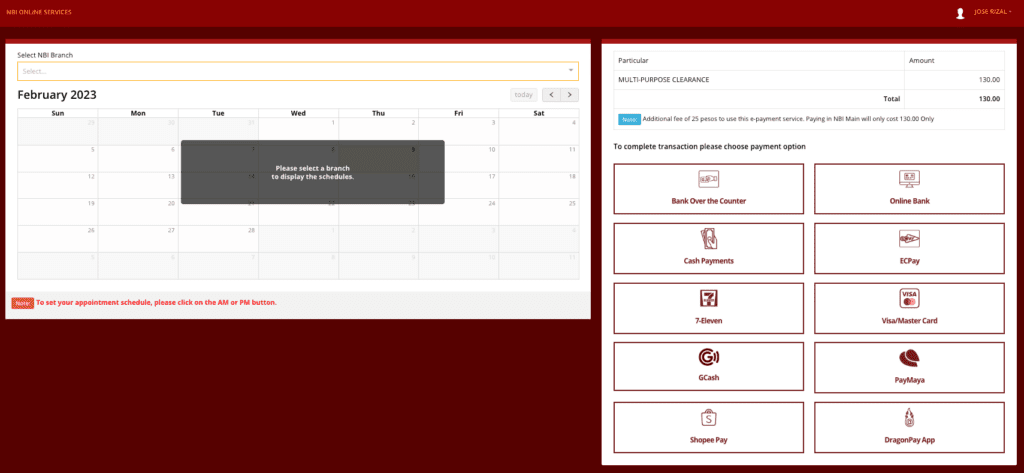
3. To ensure that you have a smooth and convenient experience when applying for your NBI Clearance, it is highly recommended to choose the nearest NBI Branch from the drop down list on the “Apply for Clearance” page.

This will save you time, money and effort in traveling to a faraway branch. Moreover, by choosing a nearby branch, you can minimize the risk of getting caught in traffic or missing your appointment due to unforeseen circumstances.
Some may argue that the location of the branch may not matter, as long as you are able to complete the application process. However, choosing the nearest branch can significantly reduce stress and ensure a more seamless experience.
4. After selecting the NBI Branch, the next step is to choose the date and time of your NBI Online Appointment, whether AM or PM. It is important to choose a time that works best for you and to consider factors such as traffic, work schedules, and other commitments.
NBI Clearance Fee Payment
You have made a wise choice in scheduling your NBI Clearance appointment online, as this will save you a lot of time and hassle compared to doing it in person.
1. But before we proceed to the payment process, let’s first take a look at the initial summary of your transaction that will appear on your screen.
It is important to note that the amount displayed, which is P130, is not final and may still change as you proceed to the next steps.
2. Now that you have taken a quick look at the summary, it’s time to decide on the payment option that you want to use. With 10 options available, you are free to choose the one that is most convenient and accessible to you.
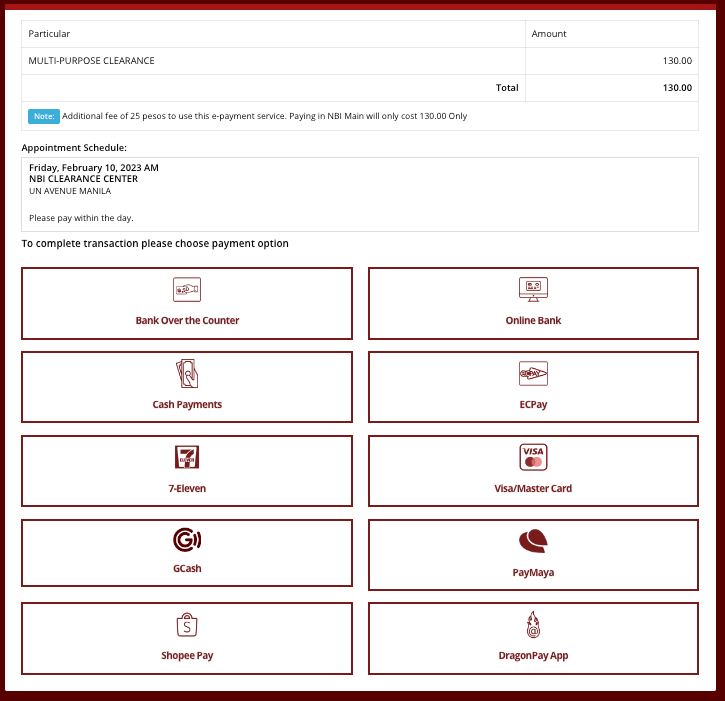
However, for this tutorial, we will use GCash, since this option is widely used and many of us are already familiar with it.
3. To start the payment process, simply press the GCash icon from the list of payment options shown. You will then be taken to the next steps where you will be reminded of the initial NBI Clearance fee summary through two small pop-out windows.
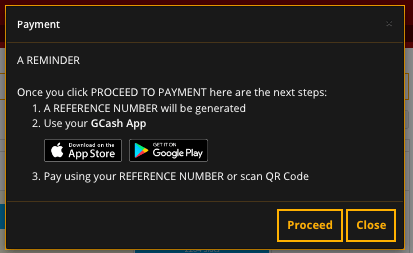
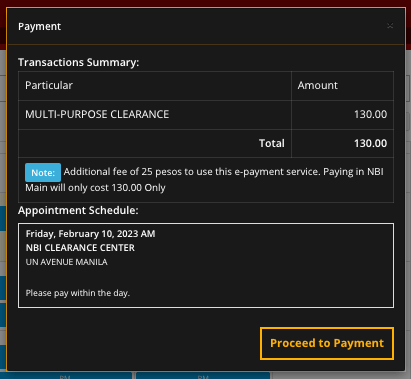
Again, it is important to remember that the amount displayed is not final yet, so don’t worry about it for now. Just press the “proceed” and “proceed to payment” buttons.
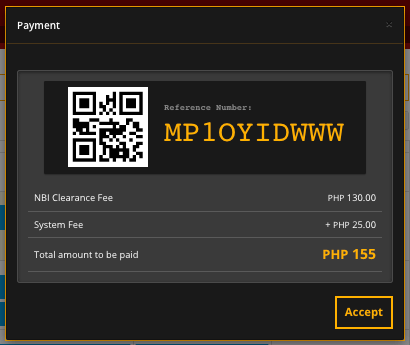
4. The third pop-out window will contain very crucial information that you should take note of. This includes your NBI Clearance Reference Number and the final amount of the NBI Clearance Fee.
Did you notice that the NBI Clearance fee has increased from P130 to P150? This is because of the System Fee of P25 which is added to the total cost. This fee is unavoidable, so it’s best to be prepared for it.
To ensure a smooth and hassle-free payment process, make sure to take note of the NBI Clearance Reference Number. This will serve as your reference number when paying through GCash and will also be asked by the NBI Clearance staff when they start processing your application. So, be sure to keep it in a safe place where you can easily access it.
5. The first step in paying your NBI Clearance fee through GCash is to log into the app on your mobile phone. This is essential as it will ensure that you are able to access your account and make the payment using the convenience of your device.
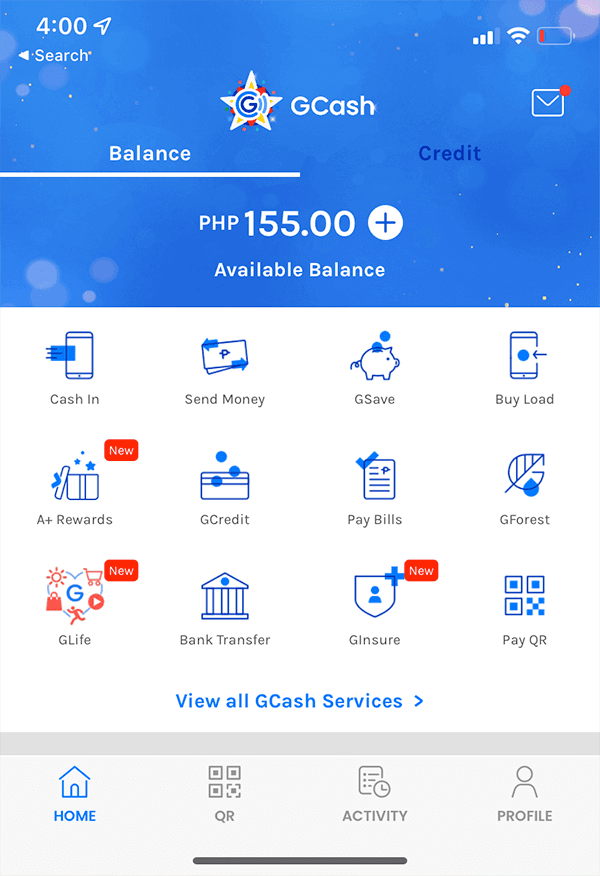
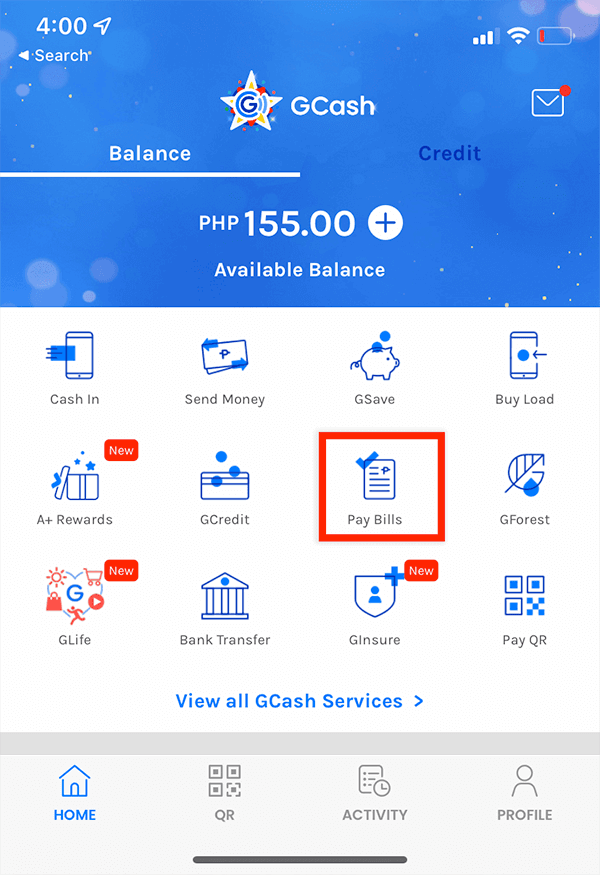
6. After logging in, you should be able to easily find the “Pay Bills” icon on the GCash app. By tapping on it, you will be taken to the screen where you can make bill payments.
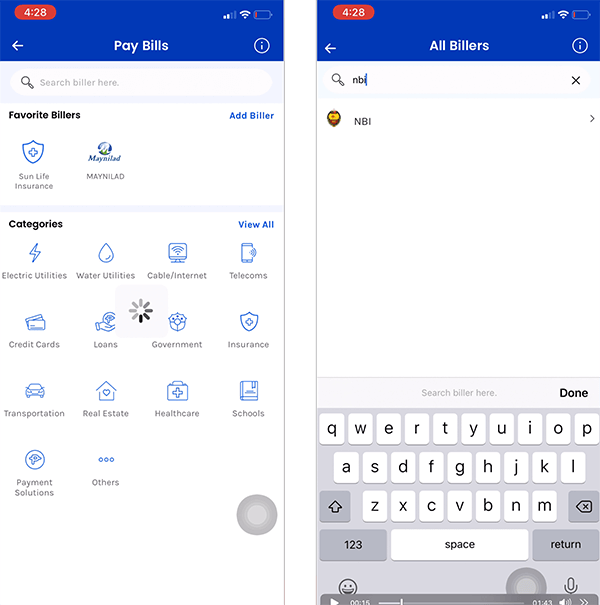
7. On the “Pay Bills” screen, you will see a search bar where you can type in the name of the merchant you want to pay. In this case, you want to pay for your NBI Clearance fee, so you will type in “NBI.” Once you do this, the NBI Clearance merchant option will appear and you can proceed by simply tapping on the NBI Clearance logo.
8. Now that you have selected the NBI Clearance merchant option, it’s time to fill in the required information. This includes the NBI Clearance Reference number, your contact number, the payment amount, and your email address.
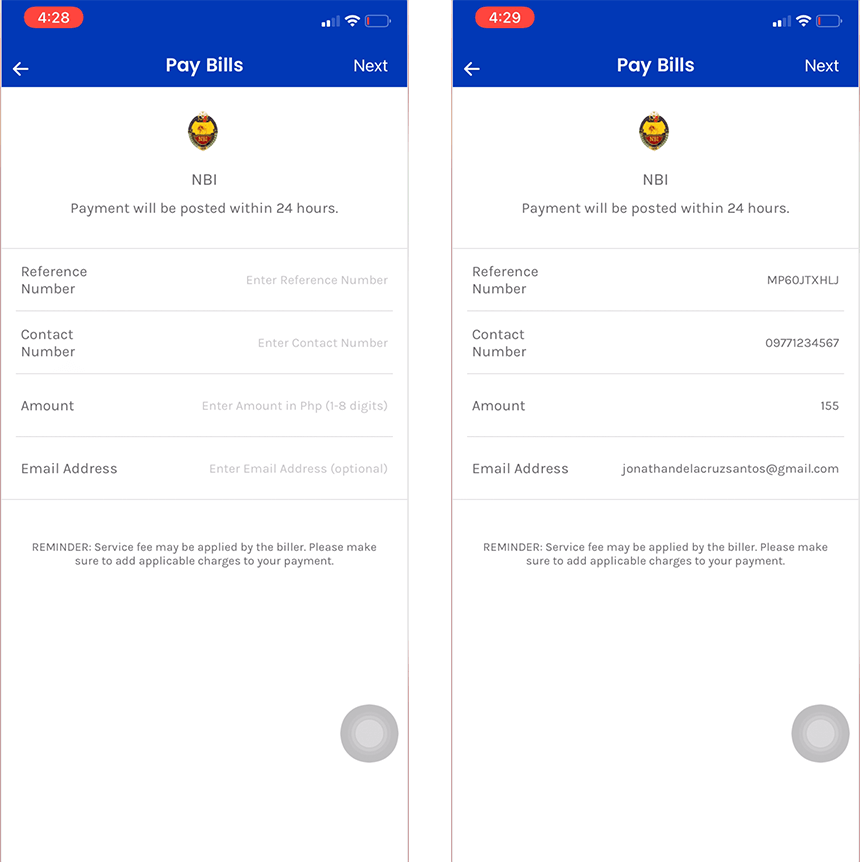
Make sure to double-check everything before you hit the “Confirm” button located at the top of the screen. Remember, accuracy is key here!
9. After you hit the “Confirm” button, your payment will be processed and you will be done! It’s that easy! Just make sure to keep a copy of the receipt as proof of payment, for example, by taking a screenshot of the confirmation screen on your mobile phone. You never know when you may need it, so it’s better to be safe than sorry!
Congrats! You’ve successfully completed the initial steps in obtaining your NBI Clearance. By now, you’ve registered an account, logged in (www.NBI Clearance.GOV.ph Login) and filled in all your personal details, scheduled an appointment, and paid the required fees through GCash.
NBI Clearance Requirements
Let’s take a moment to reflect on what we’ve accomplished so far. By following this tutorial, we’ve ensured that you’ve taken the necessary steps in preparing for the NBI Clearance processing at your chosen branch. You’re one step closer to obtaining the clearance you need.
It’s time to move on to the next phase – the actual processing of your NBI Clearance. This will be done at your chosen branch on the day of your appointment date.
However, before we proceed, I must remind you of the requirements you need to bring with you on your appointment date. These are crucial to ensure a smooth and successful processing of your NBI Clearance.
Firstly, don’t forget to bring your NBI Clearance reference number. This is an essential piece of information that we’ve obtained from www.NBI Clearance.gov.ph when we scheduled your appointment. This reference number will help the staff at the branch identify your WWW.NBI.GOV.PH Online Appointment and the payment you’ve made.
Secondly, bring at least two government-issued valid IDs. This is to verify your identity and to ensure that you are the one applying for the NBI Clearance. It’s important to note that the government-issued IDs must be valid, meaning they have not yet expired. Having these documents ready will make the processing faster and smoother, ensuring that you’ll receive your NBI Clearance in no time.
The valid IDs accepted are the following:
- Philippine Passport
- Voter’s ID
- Driver’s License
- PRC License
- SSS ID – (How To Apply SSS ID)
- GSIS UMID
- Postal ID
- School ID
- TIN ID
- Philhealth ID
- Alien Certificate of Registration
- Senior Citizen ID
Processing Your NBI Clearance Application at the Branch
The National Bureau of Investigation, or NBI, requires that all applicants complete both the online and in-person portions of the NBI Clearance process to ensure the accuracy and security of the information provided.
While the NBI Online Registration portion of the application process is convenient and efficient, it is not enough to fully verify the identity of the applicant.
That’s why it is important for the NBI to physically take an updated photo and scan your fingerprints, as this allows for a more thorough and reliable means of verifying your identity.
And let’s not forget, it is also a way for the NBI to ensure that those who apply for the NBI clearance do not have any pending warrant of arrest or criminal cases under their name.
Some may argue that the in-person portion of the process is a hassle and takes away from the convenience of the online process.
However, the in-person portion of the process is necessary to maintain the integrity of the NBI clearance system and to protect the security and well-being of all citizens. So, it is ultimately worth the effort.
1. Upon arrival at your scheduled NBI branch for either the morning or afternoon session, make your way directly to the biometrics section.
In order to efficiently complete the process, be sure to bring along your NBI Clearance Reference number and two valid forms of identification.
1. Upon arrival at your scheduled NBI branch for either the morning or afternoon session, make your way directly to the biometrics section.
2. Once you have presented the necessary information to the NBI Clearance staff, you will proceed to have your photo taken. While there is no rule against smiling, it is recommended that you maintain a neutral expression in order to ensure a clear, recognizable photo. However, the choice is ultimately up to you.
3. After your photo has been taken, the NBI staff will ask you to scan your fingerprints using a designated device. Don’t worry, they will provide clear instructions on how to do so.
4. The NBI staff will then display the information you provided in your online application form, giving you the opportunity to review it for accuracy and make any necessary changes. Take advantage of this opportunity to double-check your details and make sure everything is correct.
5. It is important to carefully review the information in your application form, as any inaccuracies or errors can potentially cause delays or complications in the clearance process. If you do identify any issues, simply inform the NBI staff and they will make the necessary adjustments for you.
NBI Clearance Releasing
Are you ready to finally receive your NBI Clearance? The final steps will determine if you will finally hold it in your hands within a few minutes. So, be attentive and follow these steps closely.
As soon as the NBI Staff submits your application to their system, a crucial verification check will take place. This check will determine if you will receive your NBI Clearance right away or if you need to wait a bit longer.
The result of this verification check is either a HIT or NO HIT. Now, you may be thinking to yourself, “What exactly is a HIT?“
NBI Clearance Releasing with HIT
A HIT means that the NBI system has found a namesake match and that further checks will need to be done by the staff. This may also mean that your namesake has a pending warrant of arrest or an ongoing criminal case. Unfortunately, due to the need for in-depth verification, you will be asked to return after eight (8) working days to claim your NBI Clearance if you receive a HIT result.
NBI Clearance Releasing without HIT
However, if the result of the verification check is a NO HIT, then you will be in luck! This means that you can receive your NBI Clearance immediately. The NBI Staff will instruct you to go to the releasing area to wait for your NBI Clearance to be printed and handed out to you.
So, there you have it. The final steps in the NBI Clearance application process. Follow these steps closely and you will be well on your way to holding your NBI Clearance in your hands. Just remember, the result of the verification check can make or break the speed of your application process.
6 thoughts on “WWW.NBI Clearance.GOV.PH”
How to sign up for clearance ?i cant reach the nbi clearance koronadal branch,is it ok if i go directly in to office of nbi without appointment ?
Online appointment
In mall of Asia branch no need and appointment.